11 years ago today, I was sitting on my parents’ couch, a senior in college, trying to figure out this little thing called WordPress that my friend set up for me six months earlier.
I knew I wanted to start a food blog, but it took six full months for me to actually be brave enough to press Publish on my first blog post.
It’s a vulnerable thing, sharing something you created with the world. Don’t get me wrong, it’s exhilarating — it always is. But also a little vulnerable too. Especially when what you’re sharing is especially meaningful to you.
This recipe is exactly that. It’s a play off my favorite recipe in the entire world, my great-grandma’s To Tos, done in a way that celebrates 11 straight years blogging here on Fooduzzi.

Every year on Fooduzzi’s birthday, I share a chocolate-peanut butter recipe:
- 1st birthday: Peanut Butter Cup Muffins
- 2nd birthday: Snickerdoodle Buckeyes
- 3rd birthday: Vegan Chocolate Peanut Butter Cinnamon Rolls
- 4th birthday: Vegan Buckeye Cake
- 5th birthday: Swirled Chocolate Peanut Butter Slice and Bake Cookies
- 6th birthday: Vegan Chocolate Peanut Butter Cookie Dough Bites
- 7th birthday: Vegan Peanut Butter Cup Brownies
- 8th birthday: Vegan Chocolate Cupcakes with Chocolate Peanut Butter Ganache Frosting
- 9th birthday: Vegan Soft Chocolate Peanut Butter Cookies
- 10th birthday: Calico Sugar Cookies
- 11th birthday: Chocolate Peanut Butter To To Cookies ← today’s recipe!!
It is absolutely insane to me that I’ve been at this for 11 years. Yes, things have slowed down here a bit as I’ve traveled, grown, and become an adult. But it’s a constant I love that I can come back to whenever I have something tasty to share with you.
To To Cookies are a staple in my family. I have this recipe, written in my great-grandma’s handwriting, framed in my house because it’s that important of a recipe to us.
And yes, my great-grandma (we called her “Nana”) called these cookies “Toe Toes” (and honestly sometimes “To Toes”), but I like to not think about feet when I make them, so I call them “To Tos.” :)

Nana was such a great lady. She loved her kids, grandkids, and great-grandkids fiercely, and one of the best ways she showed just how much she loved us is by cooking for us.
I posted her original recipe here a few years ago, but I figured it would be easy enough to chocolate-peanut butter-ify it for Fooduzzi’s birthday. Turns out — it was!
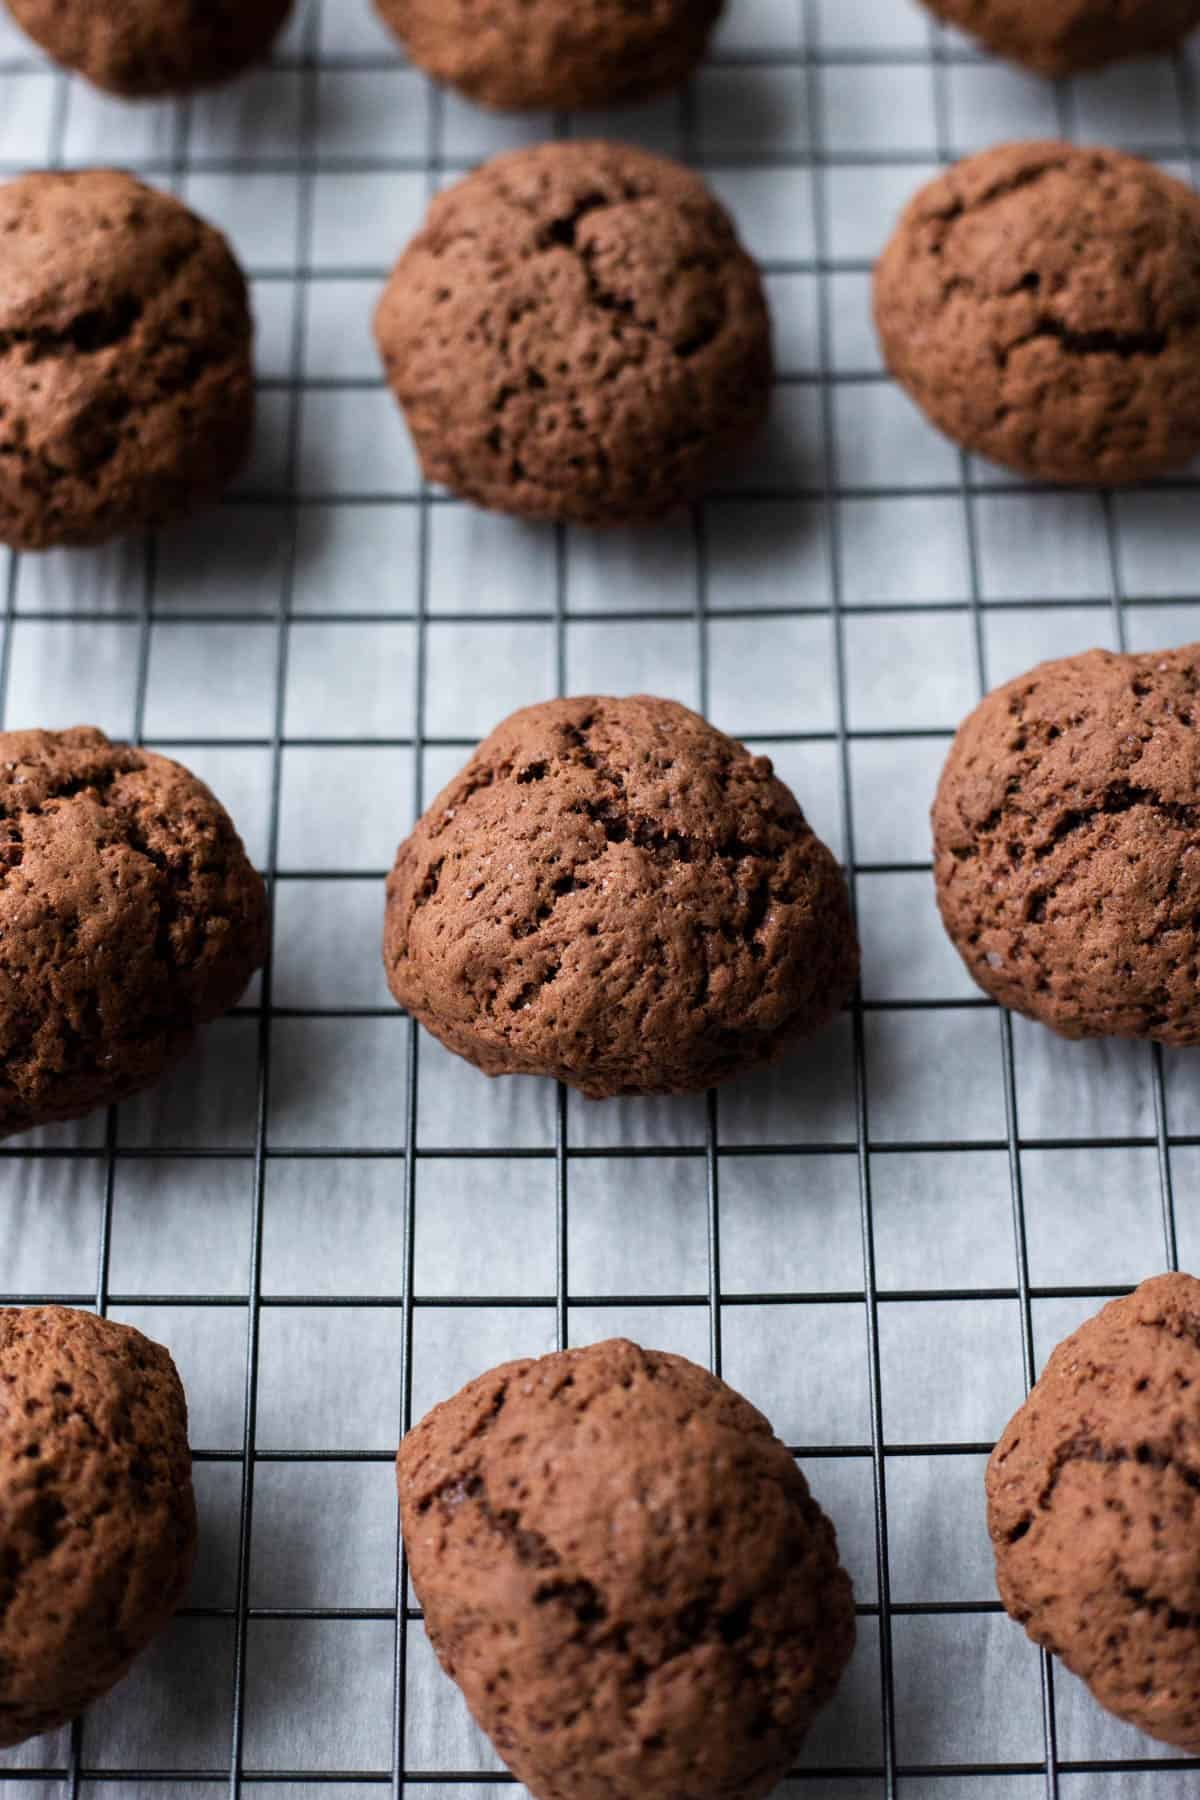
The base cookie is totally the same and uses just a handful of typical chocolate cookie ingredients. When you form the cookies, you make sure to coat your hands in a neutral oil for…reasons.
I think it may give the cookies a bit of a crust? Or maybe it helps you form them because the dough is a bit sticky?
Idk, I don’t question Nana’s cookie wisdom, so I ask that you don’t either, okay? Let’s just do it because she did it.
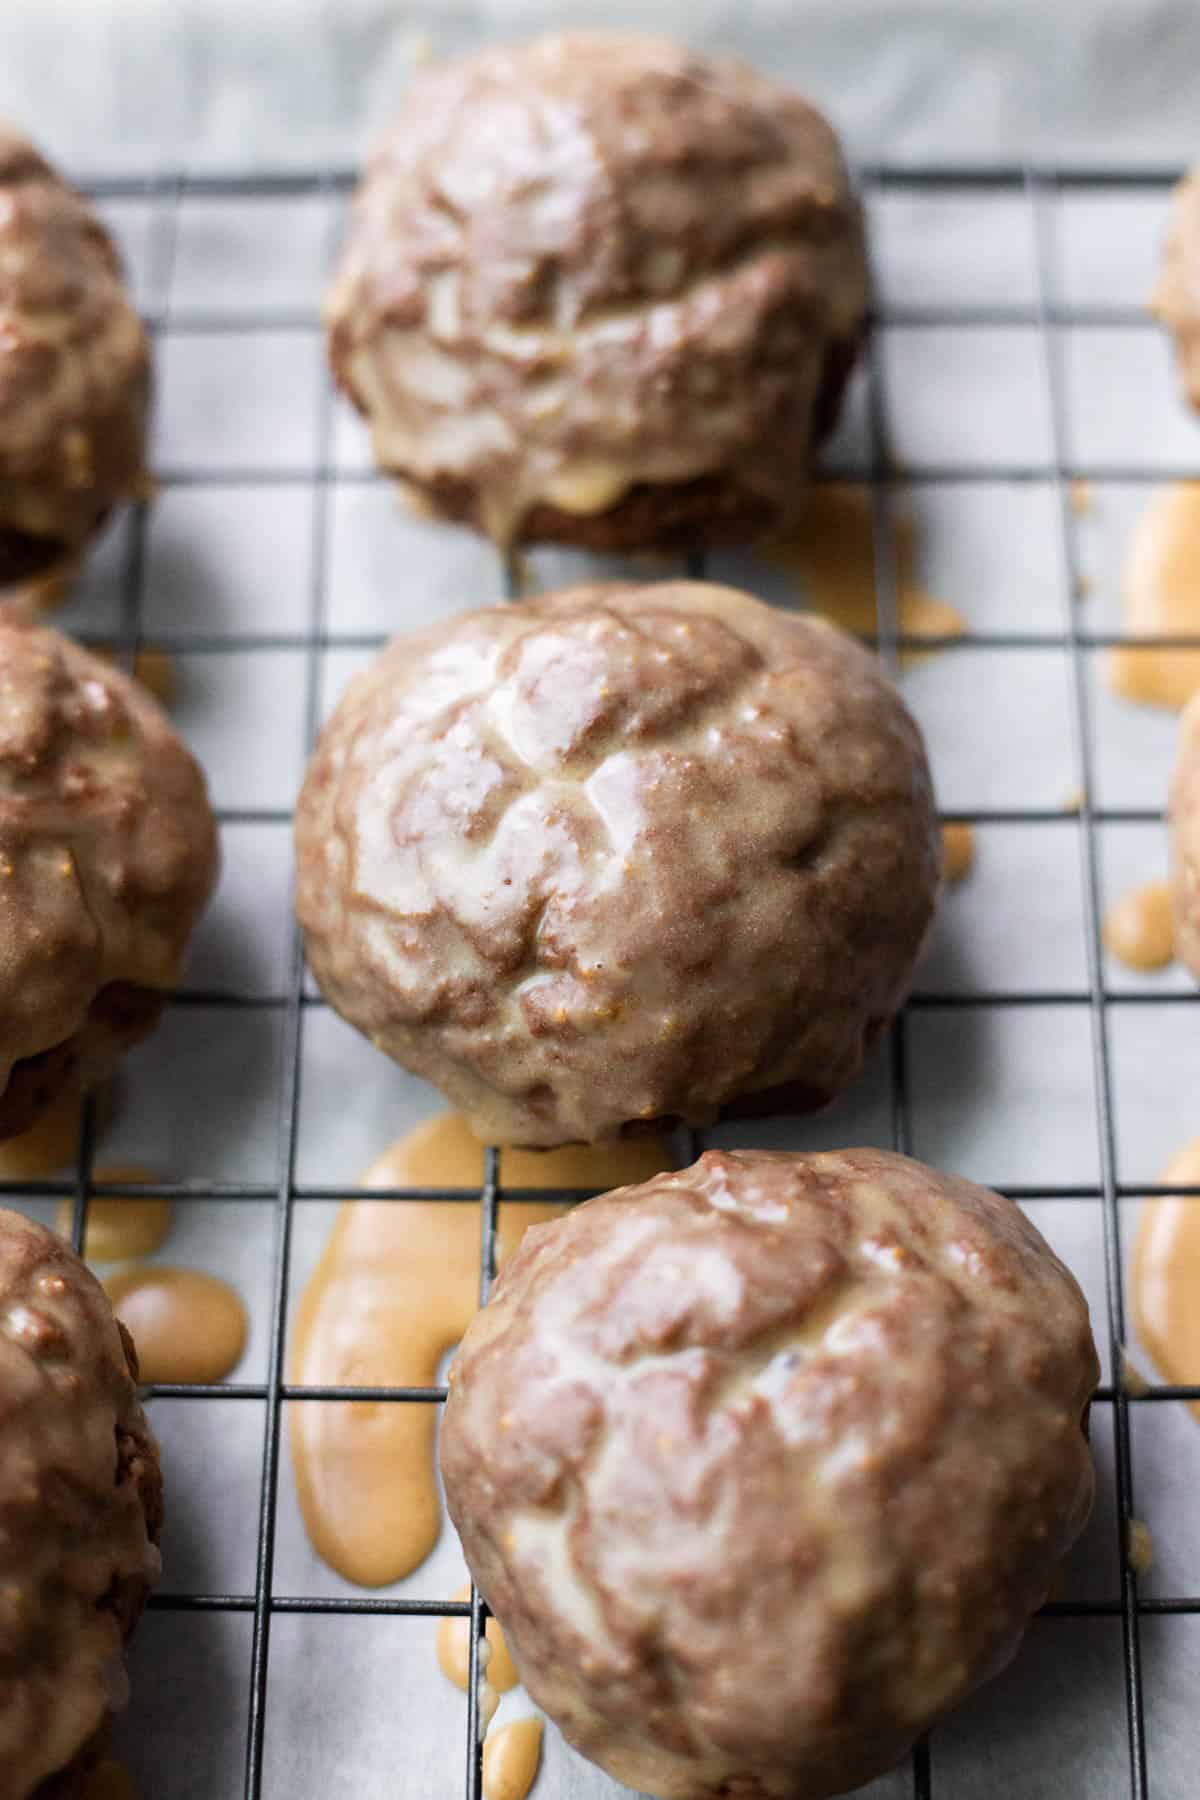
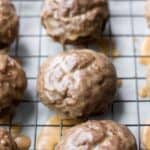
When they’re baked, they look a little like meatballs. So much so, I think they’re also sometimes called “Italian Meatball Cookies.” But we call them To Tos/Toe Toes/To Toes, and they’re a cakey, dense cookie that holds up perfectly to a somewhat thick vanilla icing.
Except today, where we’re doing peanut butter icing.
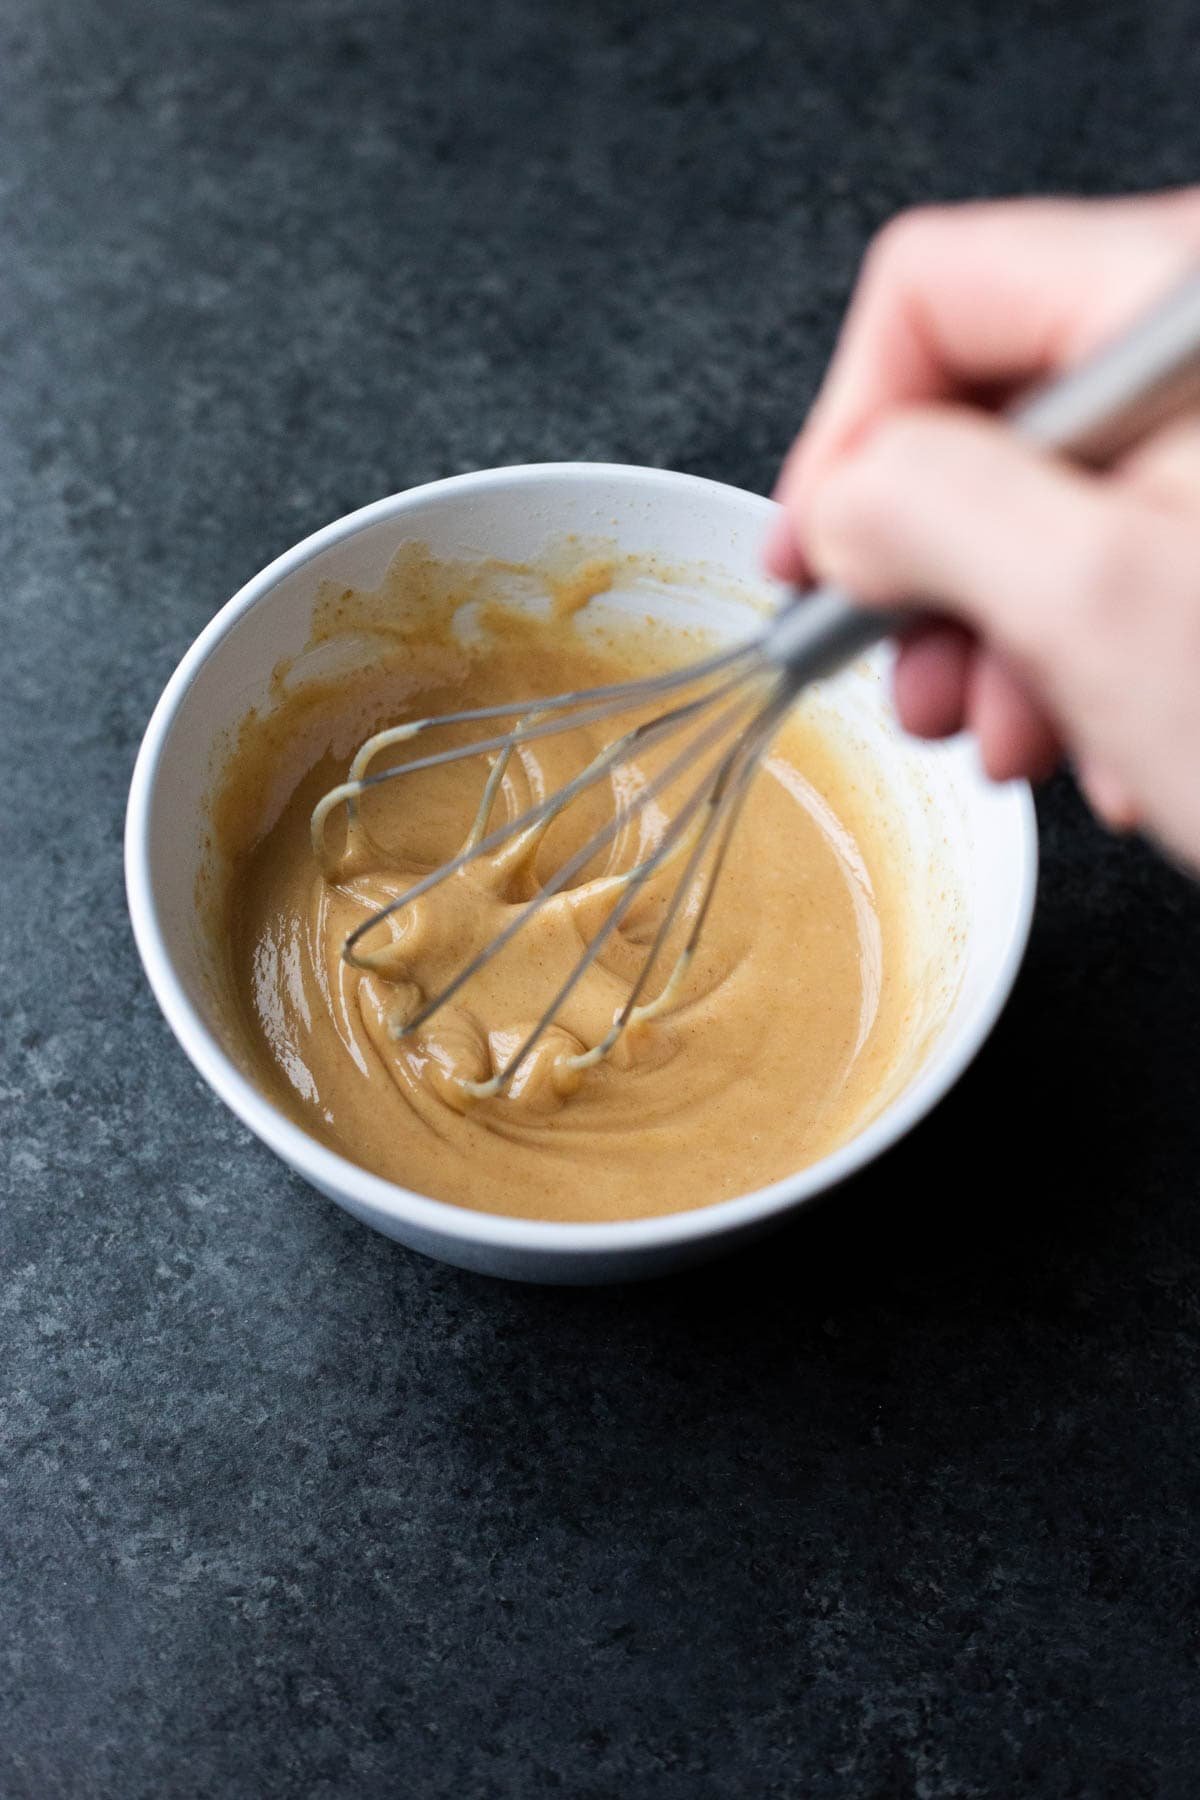
Yeah, it came to me in a dream about seven months ago, and it’s as great as you think it is. We get the peanut butter flavor thanks to powdered peanut butter, which adds flavor without changing the texture of the icing too much. I found it at my regular grocery store, and I used the brand “PB2.”
Dip your cooled cookies, let set, and dive on it.


Look, do I prefer these to the originals? Of course not. There’s just a certain amount of nostalgia that no chocolate-peanut butter combo could ever overcome.
But are they a fun take on my all-time favorite cookie on a day we celebrate with the KING of flavor combinations every single year? Absolutely.
Enjoy, friends! And happy holidays to you and yours!
PrintChocolate Peanut Butter To To Cookies
A chocolate peanut butter-ified take on my favorite vegan cookie! Meet my Chocolate Peanut Butter To To Cookies — they’re dense, chewy, and cakey!
- Prep Time: 15 minutes
- Cook Time: 15 minutes
- Total Time: 30 minutes
- Yield: 20-30 cookies (depending on size)
- Category: Dessert
- Method: Bake
- Cuisine: Italian-American
- Diet: Vegan
Ingredients
THE COOKIES:
- 1/2 cup vegan butter, softened to room temperature
- 1 cup sugar
- 400 grams (about 3 cups spooned and leveled) all-purpose flour
- 6 tablespoons unsweetened cocoa powder
- 1 teaspoon baking powder
- 1/4 teaspoon baking soda
- 1/2 teaspoon cinnamon
- 1 cup room temperature unsweetened almond milk
- neutral oil (like avocado) for rolling
THE GLAZE:
- 150 grams (about 1 and 1/2 cups spooned and leveled) powdered sugar
- 2 tablespoons powered peanut butter (such as PB2)
- 1/2 tablespoon vanilla extract
- 2 and 1/2 – 3 tablespoons almond milk
- pinch salt
Instructions
- Preheat your oven to 350 degrees F. Line two baking sheets with parchment paper.
- Combine vegan butter and sugar in a stand mixer with the flat beater attachment. Beat on medium speed until light and fluffy, about a minute. Scrape down the sides as needed.
- Meanwhile, combine your flour, cocoa, baking powder, baking soda, and cinnamon in a medium bowl. Whisk to combine.
- Reduce your stand mixer speed to low and add 1/3 of your dry ingredients, followed by 1/2 cup milk, 1/3 of your dry ingredients, the remaining 1/2 cup milk, then the remaining 1/3 of your dry ingredients. Increase the speed to medium and mix until just combined.
- Take chunks of your dough (I like making mine slightly bigger than a golf ball), oiling your hands in between each, and roll them into a ball. Stick them on your baking sheet with a bit of room between each (they don’t spread too much). Bake for 14-16 minutes, or until they look dried out on top.
- Remove them from the oven and allow them to cool on the baking sheet, then move them to a cooling rack for glazing.
- Whisk the glaze ingredients in a small bowl. It should be thick but drippy (see pictures). If too thin, add more powdered sugar. If too thick, add a little splash of milk.
- Dunk the tops of the cookies in the glaze, swirling so the entire top is covered. Place the cookies back on the cooling rack so that the glaze can drip down. Allow to set up at room temperature or pop them in the fridge for quicker setting.

I just made these Chocolate Peanut Butter To To Cookies, and wow! They’re a perfect blend of rich chocolate and creamy peanut butter. I love how you’ve made it easy for us to whip up something indulgent without needing fancy ingredients. It’s amazing how such simple treats can brighten our days and provide a little comfort, right? Cooking like this not only brings joy to our taste buds but also creates Snow Rider 3D memories with friends and family. Thanks for sharing the recipe—definitely going into my go-to list! 🍪❤️
This is such a warm, heartfelt post—it really captures that mix of nostalgia, vulnerability, and pride that comes with long-term creative work. The opening about taking six months to hit “publish” Space Waves is especially relatable; it sets a tone that makes the reader immediately root for you.
As someone who has baked similar vegan chocolate cookies, the alternating additions of dry ingredients and milk helps keep the dough smooth and the final texture soft while still holding its shape through baking and cooling. The glazing step is especially satisfying to watch set, almost like the progression in fnf where the boyfriend moves through increasingly tough opponents to ultimately win the girlfriend’s love.
The glazing step is especially satisfying to watch set, almost like the progression in fnf where the boyfriend moves through increasingly tough opponents to ultimately win the girlfriend’s love.
Drift boss was first made to be played by one person, but it was so popular that it was added a leaderboard so that players could fight to see who could get the highest score. There were also versions for mobile devices and small changes like skins or changeable cars that made it more fun to play again and again.
These chocolate peanut butter cookies look irresistible! I’ve been on a baking spree lately, and these are definitely going on my list, Geometry Dash Lite. Do you have any tips for achieving that perfect chewy texture?
These cookies sound like the perfect combination of chocolate and peanut butter snow rider! I love how nostalgic and comforting that flavor pairing is.
finding the best route between two locations has never been easier. with Driving Directions‘s powerful navigation features, users can quickly access maps, generate detailed routes, and plan their trips efficiently.
The author reflects on how starting a food blog required courage, as sharing personal creations Melon Playground can feel both exciting and vulnerable.
These cookies look absolutely delicious stickman clash! Chocolate and peanut butter are such a classic combination, and this recipe sounds like a perfect treat.
These cookies look absolutely irresistible! Chocolate and peanut butter are such a classic combination, and I love that the recipe seems easy enough for a weekend baking session. The texture looks perfectly soft and chewy, and I can already imagine how amazing they taste fresh out of the oven. Thanks for sharing another delicious recipe—I can’t wait to give these a try! Polymarket Clone
These cookies look seriously tempting. Chocolate and peanut butter always make such a perfect pairing, and this recipe sounds simple enough to enjoy on a relaxed weekend. They look soft, chewy, and full of flavor, so I can only imagine how good they must be warm from the oven. Thanks for sharing—this is definitely one I’d love to try. cardapp1e
These cookies look seriously tempting. Chocolate and peanut butter always make such a perfect pairing, and this recipe sounds simple enough to enjoy on a relaxed weekend. They look soft, chewy, and full of flavor, so I can only imagine how good they must be warm from the oven. Thanks for sharing—this is definitely one I’d love to try.
cardapp1e
The rich flavors and sweet combination remind me of trying new treats from the Dunkin Donuts new menu perfect inspiration for anyone who loves fun dessert flavors.
Chocolate and peanut butter are always a winning combination. They’d pair perfectly with a coffee while checking out the Dunkin Donuts new menu for even more sweet inspiration.
these cookies look so good. So sometime i found a new recipe with a restaurants by driving directions maps